Creating a beautiful garden in an urban setting can feel overwhelming, especially when it comes to watering. With limited space and resources, finding effective and affordable ways to keep your plants healthy is a challenge many urban gardeners face. That’s why I created this post about PVC pipe sprinklers! These DIY builds not only save you money but also give you the flexibility to design a watering system that fits your specific space and needs.
If you’re someone who loves to garden but struggles to keep everything watered, you’re in the right place. Whether you’re a seasoned gardener or just starting out, these PVC pipe sprinkler ideas are perfect for anyone looking to improve their garden watering techniques. They are simple, creative, and ideal for making the most of your limited urban garden space.
In this guide, you’ll find twelve unique PVC pipe sprinkler DIY projects that are practical and easy to replicate. From vertical systems that maximize space to drip irrigation setups for potted plants, these solutions will help you keep your garden thriving without breaking the bank. Get ready to dive into these fun and useful designs that will transform the way you care for your plants!
Key Takeaways
– Explore 12 unique PVC pipe sprinkler designs that cater to various garden needs and spaces, perfect for urban gardeners.
– Learn how to create vertical and horizontal sprinkler systems to utilize every inch of your outdoor space efficiently.
– Discover the benefits of DIY oscillating and drip irrigation systems, which can save water while ensuring your plants receive the moisture they need.
– Find tips on customizing adjustable sprinkler heads and multi-zone systems to tailor your watering routine based on your garden’s specific requirements.
– Gain insights into maintenance tips for PVC pipe sprinklers, ensuring your homemade systems remain functional and effective for years to come.
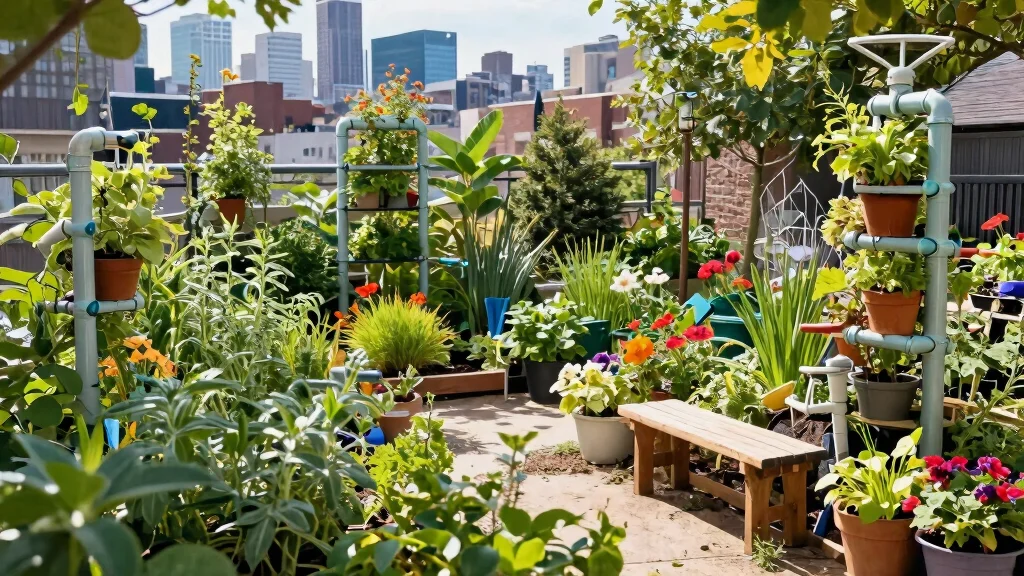
1. Vertical PVC Pipe Sprinkler System
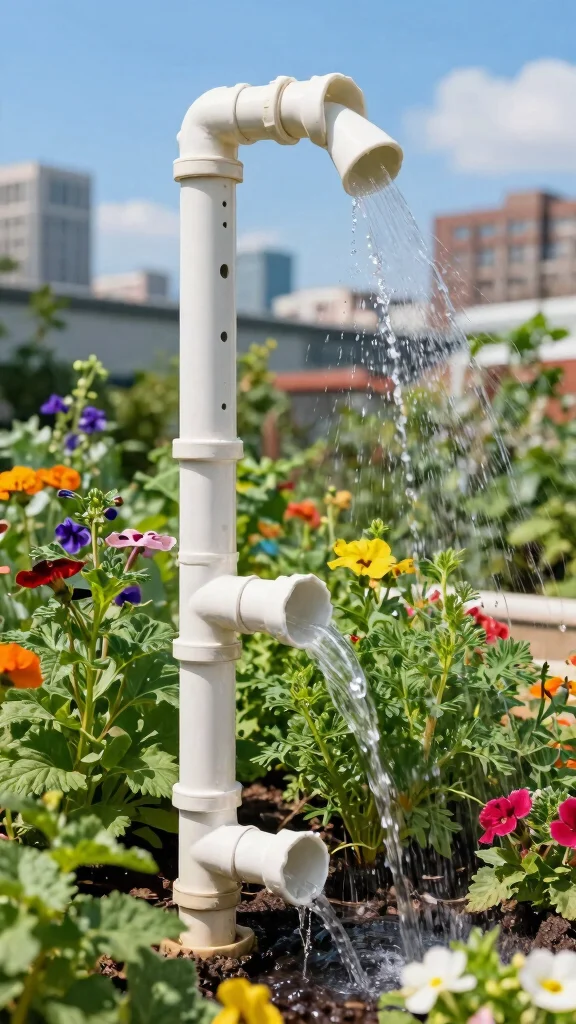
Looking to maximize your garden space? A vertical PVC pipe sprinkler system is just what you need! This setup waters your plants from above, reducing water loss through evaporation and delivering a gentle rain-like shower. By using a few PVC pipes mounted upright, you can create a beautiful and efficient watering solution. Simply drill holes along the pipes to allow water to flow freely to your plants below.
Start by determining the best height for your pipes based on your plants’ needs. Ensure the holes are spaced evenly to promote even water distribution. This method is especially effective in smaller gardens, making the most of limited space.
Key benefits of this system:
– Utilize vertical space effectively.
– Perfect for compact urban gardens.
– Provides consistent moisture to plants.
Materials you’ll need:
– Various diameters of PVC pipes.
– Elbows and tees for connections.
– A drill with a spade bit.
– Hose connector for water supply.
Steps to build your system:
1. Cut pipes to your desired height.
2. Drill holes for water dispersion.
3. Assemble using elbows and tees.
4. Connect the hose to the base.
5. Securely position in your garden.
Your plants will flourish with this innovative setup, enjoying ample water while keeping your gardening area tidy.
2. Horizontal PVC Pipe Sprinkler Layout
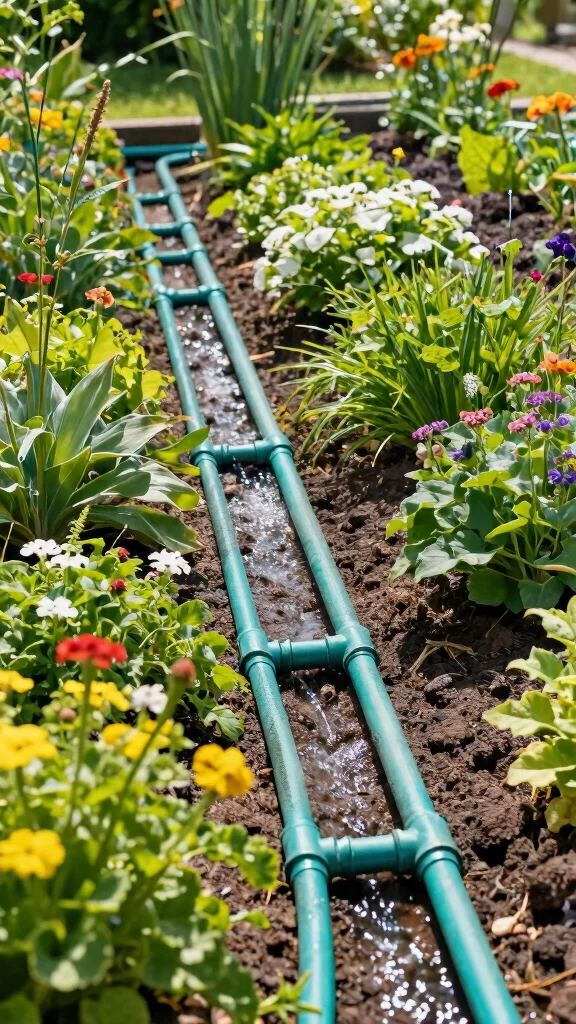
If you prefer a classic approach, a horizontal PVC pipe layout is an excellent choice for watering larger garden beds. This design allows water to flow through long pipes situated just above the soil, ensuring every plant receives adequate hydration. The key is to position the pipes correctly to cover all areas without over-saturating any spot.
Begin by measuring your garden dimensions to determine the appropriate pipe length. Lay the pipes horizontally and secure them with stakes to prevent shifting. This method is straightforward and requires minimal maintenance, making it perfect for busy gardeners.
Advantages of this layout include:
– Uniform water delivery over extensive areas.
– Easy installation and upkeep.
Materials needed:
– Long sections of PVC pipes.
– Pipe stakes for anchoring.
– Hose clamps for secure connections.
Steps to follow:
1. Measure your garden for pipe length.
2. Lay the pipes horizontally on the ground.
3. Use stakes to secure the pipes.
4. Attach a hose at one end for water supply.
5. Test the system for even flow.
With this layout, your garden beds will receive consistent hydration, ensuring healthy growth week after week!
Fun fact: A 20–25 ft horizontal PVC pipe sprinkler layout can water roughly 200 sq ft evenly when the pipes sit just above soil and are spaced every 3 ft. Stakes keep them aligned for steady irrigation.
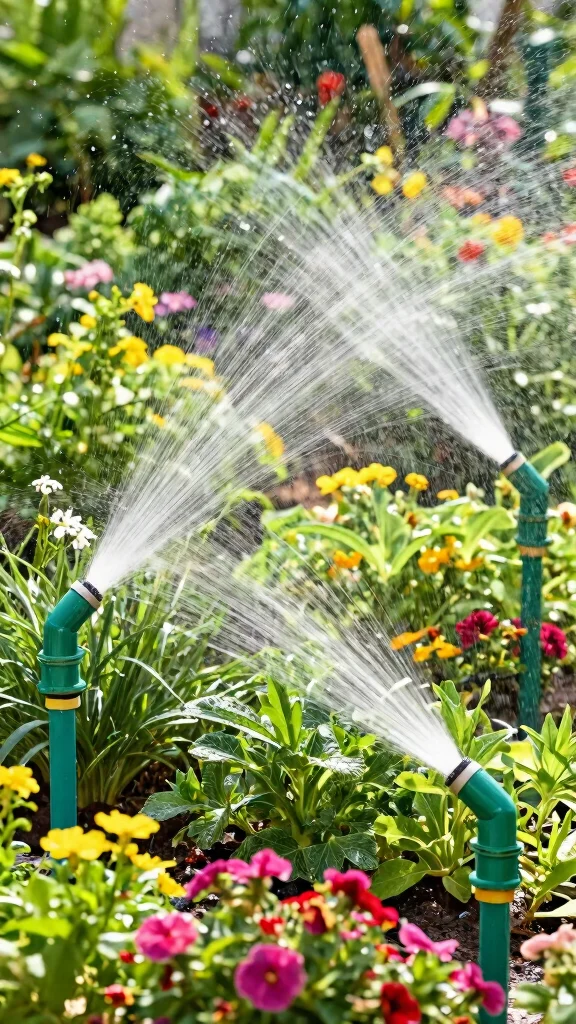
3. DIY Oscillating PVC Sprinkler
Want to add some fun to your watering routine? Create a DIY oscillating sprinkler with PVC pipes! This design allows the sprinkler to move back and forth, effectively covering a wide area while keeping your plants happy. With a bit of creativity, you can easily connect several smaller pipes to form a T-shape and add a rotating mechanism at the end.
Start by assembling the main body with T-shaped pipes, then attach a rotation feature. This oscillating sprinkler can be adjusted based on your garden size, making it a versatile option for various layouts.
Key benefits of this design:
– Efficiently waters large areas.
– Adjustable for different garden sizes.
Materials required:
– PVC pipes in various sizes.
– A small motor for automation (optional).
– Hose connector for easy attachment.
Steps to create your sprinkler:
1. Assemble the T-shaped main body.
2. Attach the rotating mechanism.
3. Connect the hose at the base.
4. Test and adjust for optimal coverage.
Your garden will love this dynamic watering solution, keeping everything lush and green!
Fun fact: a DIY oscillating pvc pipe sprinkler can cover 600–800 sq ft, far more than a single fixed sprinkler. With a simple T-assembly and rotating end, your pvc pipe sprinkler turns watering into a quick, creative fix for busy urban gardens.
4. Simple PVC Drip Irrigation
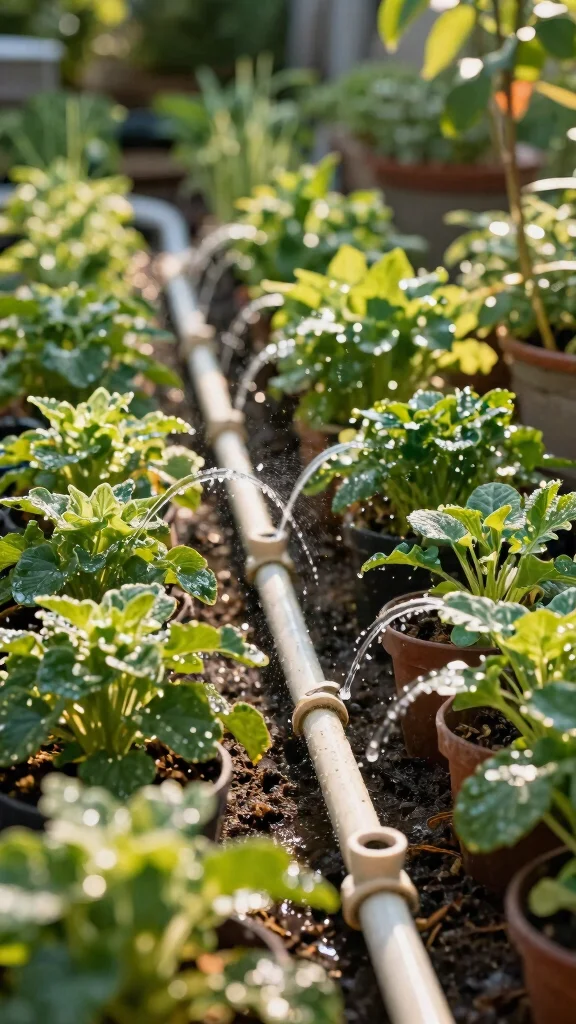
Looking for an efficient way to water your plants directly? A PVC drip irrigation system is your answer! This method minimizes water waste by delivering moisture right to the root zone. By drilling small holes along the pipe, you can create a slow-drip system that is perfect for potted plants or garden boxes.
To get started, cut the PVC pipe to your desired length and drill holes at regular intervals. Connecting this system to a water source allows for consistent moisture delivery, ensuring your plants thrive without drowning the soil.
Advantages of drip irrigation include:
– Highly efficient water usage.
– Reduces evaporation and runoff.
Materials you’ll need:
– Standard PVC pipes.
– A drill with a small bit for hole drilling.
– Hose connector for water supply.
Steps to implement:
1. Cut the pipe to your preferred length.
2. Drill small holes for water dripping.
3. Connect to your water source.
4. Lay the pipe alongside your plants.
5. Test to ensure water drips evenly.
This system not only conserves water but guarantees your plants receive the moisture they need without saturating the surrounding area.
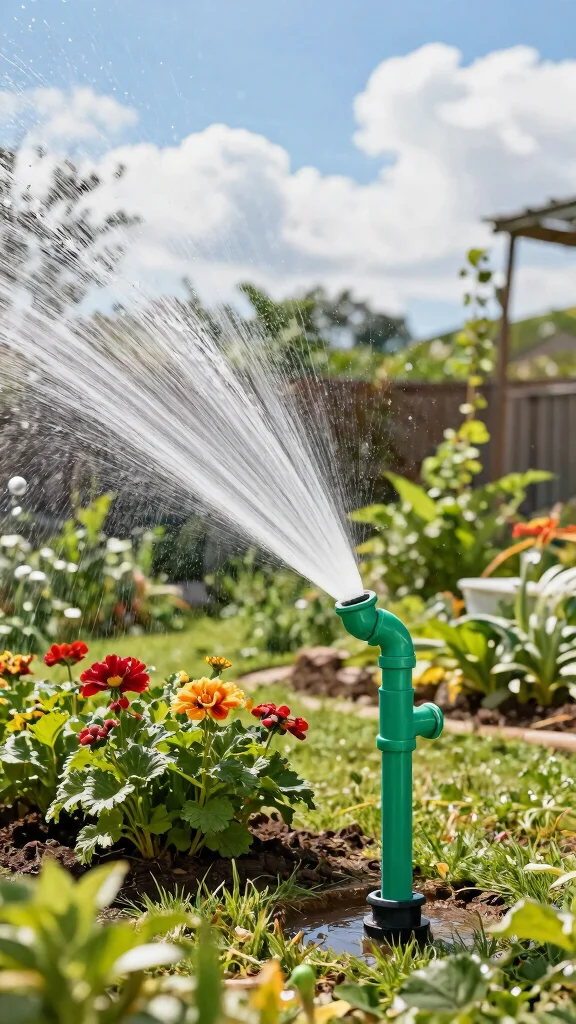
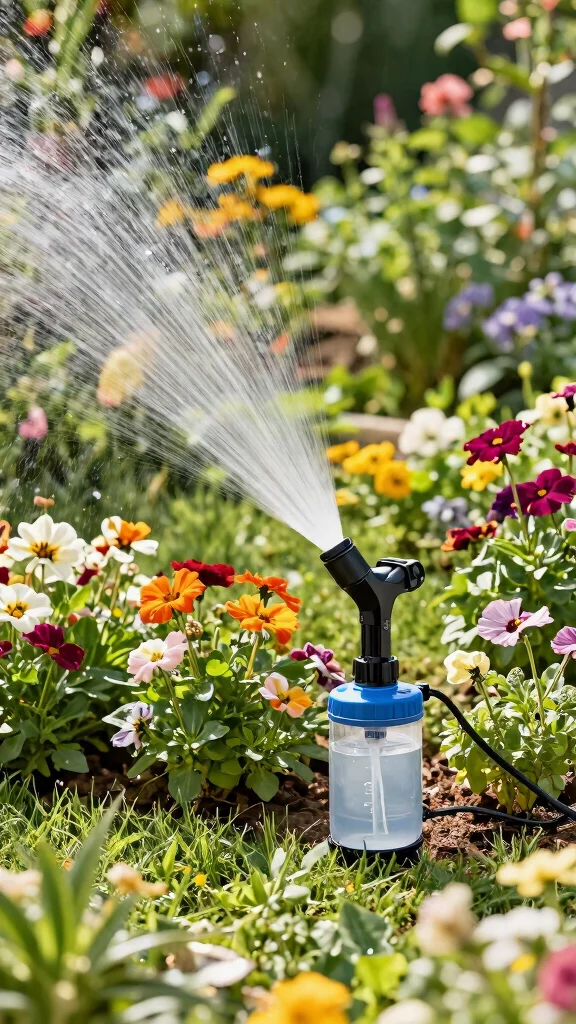
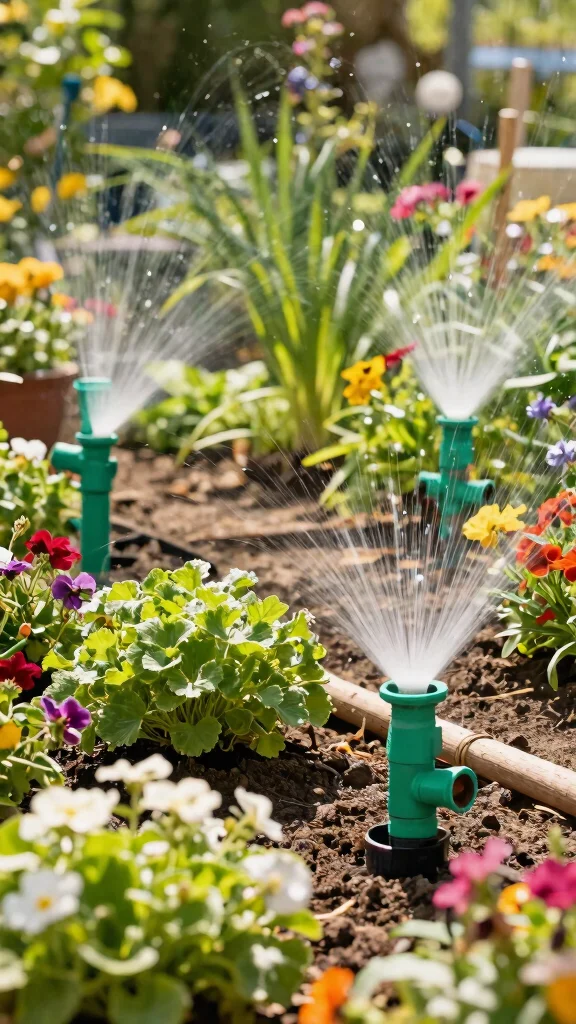
5. Adjustable PVC Sprinkler Heads
Enhance your watering system by adding adjustable PVC sprinkler heads. These versatile heads allow you to direct water exactly where it’s needed, catering to the specific requirements of different plants. Simply attach these heads to your PVC pipes and twist them to adjust the spray angle.
This flexibility is perfect for gardens with varying plant types and layouts. By customizing the watering direction, you can ensure that every plant gets its fair share of moisture without wastage.
Benefits of using adjustable heads include:
– Tailored watering solutions for every plant.
– Ideal for uneven garden layouts.
Materials needed:
– Standard PVC pipes.
– Adjustable PVC sprinkler heads.
– Hose fittings for secure connections.
Steps to set up:
1. Attach adjustable heads to PVC pipe ends.
2. Position heads according to plant locations.
3. Secure all connections.
4. Test each head for proper adjustment.
Your garden will thrive with precise watering, ensuring each plant receives just what it needs for optimal growth!
❝ Adjustable PVC pipe sprinkler heads let you aim exactly where it matters, saving water and boosting plant health. With a simple twist, you tailor spray angles for veggies, herbs, or delicate seedlings—no wasted moisture, just green results.
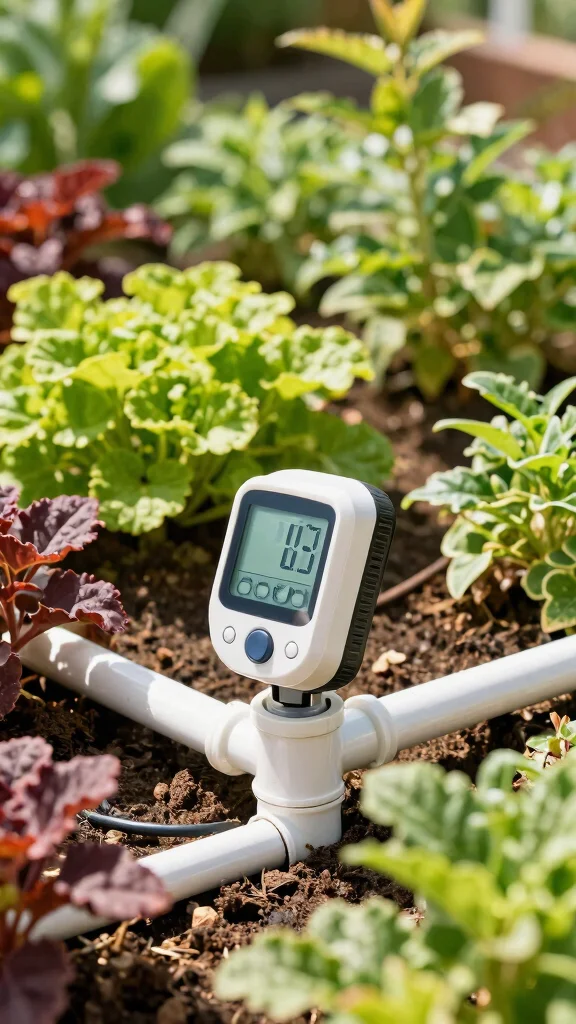
6. Multi-Zone Sprinkler Systems
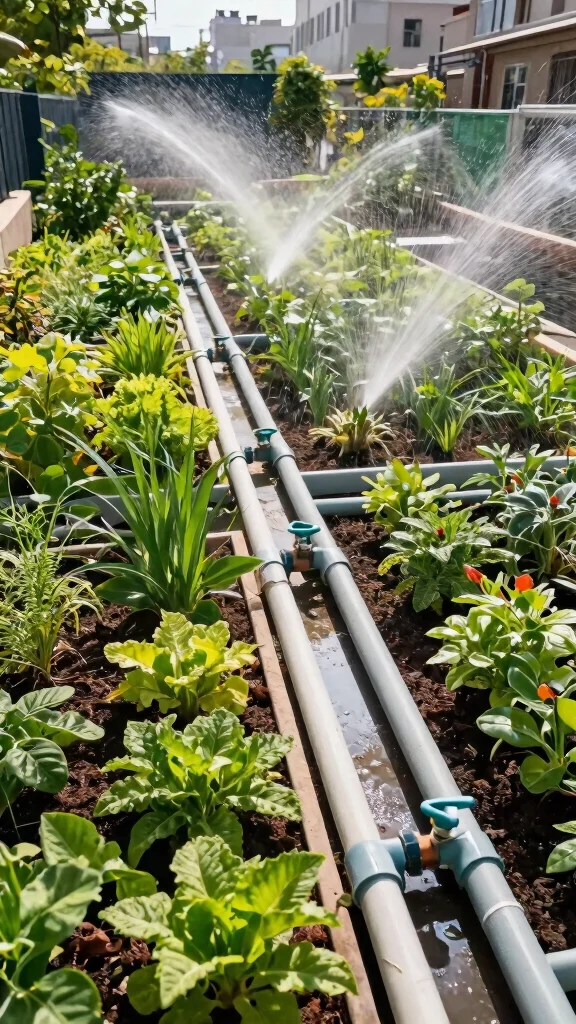
Do you have a diverse garden with plants that require different watering schedules? Consider a multi-zone PVC sprinkler system. This setup allows you to manage water delivery to various areas, ensuring every plant receives the appropriate amount of hydration. By adjusting the pipe layout and installing valves, you can cater to different plant needs effectively.
Begin by planning your garden layout and identifying zones that require specific watering. Construct separate pipelines for each zone and install valves to control the flow of water.
Key advantages of this system include:
– Customized watering for diverse plant types.
– Conserves water while promoting plant health.
Materials you’ll need:
– PVC pipes and fittings.
– Valves for controlling water flow.
– Hose connector for assembly.
Steps to create your system:
1. Plan your garden zones.
2. Build separate pipelines for each zone.
3. Install valves for every sprinkler line.
4. Connect to a water supply.
5. Test each zone for proper operation.
This system ensures your garden flourishes, as each section receives just the right amount of water it needs to thrive.
7. DIY Rain Barrel with PVC Sprinkler

Combine rainwater harvesting with your PVC sprinkler system by creating a DIY rain barrel setup. This eco-friendly project helps reduce water bills while nurturing your garden. By connecting your rain barrel to your existing PVC system, you can use gravity to assist in delivering water to your plants.
Start by positioning your rain barrel beneath a downspout and connect PVC piping from the barrel to your sprinkler system. Ensure all connections are watertight to prevent leaks.
Benefits of this setup include:
– Eco-friendly irrigation solution.
– Decreases reliance on municipal water sources.
Materials required:
– A large rain barrel.
– PVC piping for connections.
– Hose connector for linking systems.
Steps to assemble:
1. Position the rain barrel under a downspout.
2. Connect PVC from the barrel to your sprinkler.
3. Ensure all joints are leak-proof.
4. Direct water flow from the barrel to your garden.
This sustainable setup not only supports your plants but also conserves valuable resources, making your garden more eco-friendly.
8. Simple Battery-Powered PVC Sprinkler System
If you’re looking for a portable and convenient watering solution, a battery-powered PVC sprinkler system might be just what you need. This setup allows you to water different areas of your garden without being tied to a water source. Its portability makes it ideal for rotating plants or temporary setups.
Begin by assembling your PVC system and connecting a battery-powered water pump. This mobile option gives you the freedom to move around your garden easily, ensuring all plants receive the moisture they need.
Key advantages include:
– Portability and ease of use.
– Perfect for temporary or rotating gardens.
Materials needed:
– PVC pipes and fittings.
– Battery-powered water pump.
– Hose connector for assembly.
Steps to set up:
1. Assemble the PVC system as desired.
2. Connect the pump to your PVC setup.
3. Fill a water container to supply the pump.
4. Test the system to ensure it operates properly.
This solution allows you to effectively water your garden with the flexibility to move where needed!
Difficulty Rating & Requirements
Overall Difficulty Rating: Medium
Building a PVC pipe sprinkler system can be challenging but rewarding. The medium rating reflects the need for basic plumbing skills and familiarity with tools. This project is suitable for DIY enthusiasts with some experience, as well as beginners willing to learn as they go.
Time Estimate:
⏱ Estimated time: 5-8 hours
Here’s a breakdown of the main phases:
– Planning & Design: 1-2 hours to sketch out your layout and gather materials.
– Material Preparation: 1-2 hours for cutting and preparing the PVC pipes.
– Assembly: 2-3 hours to put together your system and test it out.
– Final Adjustments: 1 hour for troubleshooting and making necessary tweaks.
Skill Requirements:
– Required skills: Basic plumbing, measuring, cutting, and assembling. Familiarity with tools like saws and drills is a plus.
– Beginner-friendly: Yes. While some skills are needed, many can be learned through the process. It’s a great way to improve your DIY skills while having fun.
– Skills such as measuring and cutting can be learned as you go, but experience with plumbing is beneficial for complex builds.
Tools & Materials Needed:
🧰 Essential items checklist:
– PVC Pipes (required) – Various lengths depending on your design.
– PVC Fittings (required) – Elbows and tees to connect the pipes.
– PVC Cement (required) – To secure the fittings and pipes together.
– Saw (required) – For cutting the pipes to the desired lengths.
– Drill (optional) – For creating holes in pipes for spray heads.
– Spray Heads or Drippers (required) – Components that distribute water.
– Measuring Tape (required) – To ensure accurate cutting and layout.
– Gloves and Safety Glasses (optional) – For safety during assembly.
Step-by-Step Overview:
Here’s a concise overview of the main phases with time estimates:
– Planning Your System (1-2 hours): Start by assessing your garden’s size and shape. Sketch your sprinkler layout, considering plant placement and water needs. Decide on water pressure and type of sprinkler heads.
– Preparing Materials (1-2 hours): Gather all necessary materials. Measure and cut your PVC pipes and fittings according to your design. Organize everything for easy access during assembly.
– Assembling the System (2-3 hours): Follow your design to connect the PVC pipes and fittings using PVC cement. Make sure all joints are secured and watertight. If using a drip system, arrange drippers evenly along the pipes.
– Testing & Adjusting (1 hour): Once assembled, turn on the water to test your system. Check for leaks and ensure even water distribution. Make any necessary adjustments to angles or positions of spray heads.
Cost Comparison:
Professional vs DIY: Hiring a professional can cost anywhere from $300 to $1,500, depending on system complexity and installation. In contrast, creating your own PVC pipe sprinkler system can be accomplished for about $50 to $200, depending on the materials used and the scale of your garden. If you enjoy hands-on projects and want to save money, DIY is a great option. However, if you prefer a hassle-free installation, consider hiring a professional.
9. PVC Sprinkler for Potted Plants
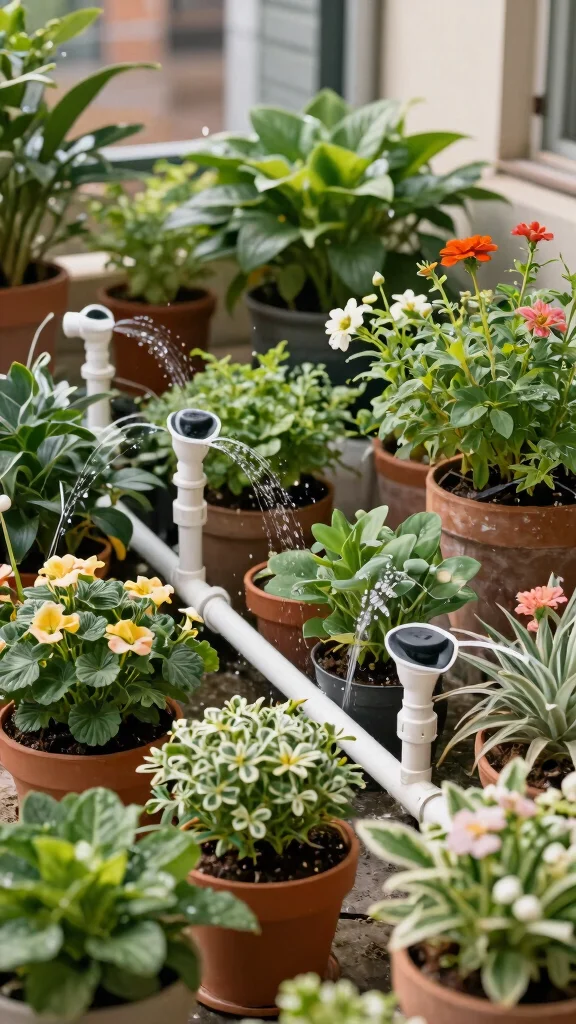
Create a dedicated sprinkler system for your potted plants using small diameter PVC pipes. This approach lets you customize watering based on the size and type of pots you have. By placing a small sprinkler head or emitter in each pot, you can ensure each plant receives adequate moisture without overwatering the soil.
Start by measuring the height and size of your pots, then cut small lengths of PVC to fit each one. Attach mini sprinkler heads to the pipes to enable even watering for every plant.
Benefits of this system include:
– Customizable for various pot sizes.
– Prevents water wastage and promotes healthy growth.
Materials required:
– Small diameter PVC pipes.
– Mini sprinkler heads or emitters.
– Hose fittings for connections.
Steps to create:
1. Measure your pots for pipe length.
2. Cut PVC lengths for each pot.
3. Attach mini sprinkler heads to the pipes.
4. Connect each pipe to a main water source.
5. Test each pot for proper watering.
Your potted plants will thrive with this tailored approach, ensuring they receive just the right amount of attention they need!
10. Timer-Operated PVC Sprinkler System
Simplify your watering routine with a timer-operated PVC sprinkler system. By incorporating a timer, you can ensure your garden is watered at specific intervals, making it ideal for busy gardeners. This automated system can easily integrate with any of the previously mentioned designs for added convenience.
Start by assembling your PVC sprinkler setup and attaching an electronic timer to the water source. Program the timer according to your plants’ needs for efficient watering without the hassle.
Advantages of using a timer include:
– Automated watering saves time and effort.
– Maintains consistent moisture levels for plants.
Materials needed:
– Standard PVC setup.
– Electronic timer for automation.
– Hose connector for assembly.
Steps to implement:
1. Assemble your PVC system as desired.
2. Attach the electronic timer to the water supply.
3. Program the timer for desired watering times.
4. Run a test to ensure everything is functioning correctly.
This system allows you to enjoy a thriving garden with minimal effort, giving you more time for what you love!
11. PVC Sprinkler with Filter
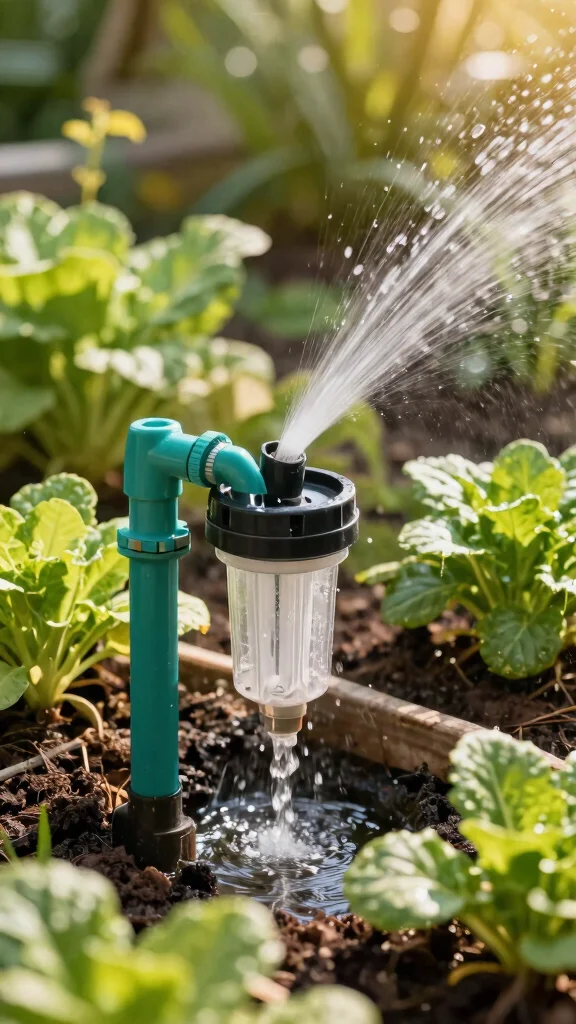
Ensure your plants receive clean water by integrating a filter into your PVC sprinkler system. This is especially crucial if you’re using rainwater or non-municipal sources. Attaching a filter at the water source prevents debris from reaching your plants, promoting healthy growth.
Begin by assembling your PVC system and installing an inline water filter at the inlet. This simple addition guarantees that your garden benefits from clean water every time you water.
Benefits of having a filter include:
– Protects plants from debris and contaminants.
– Enhances overall water quality.
Materials required:
– PVC pipes for the system.
– Inline water filter for purification.
– Hose connectors for assembly.
Steps to set up:
1. Build your PVC sprinkler system.
2. Attach the inline filter at the water inlet.
3. Connect to your water source.
4. Test the system to ensure free flow through the filter.
This straightforward improvement can dramatically enhance the health of your garden!
12. PVC Pipe Sprinkler Maintenance Tips
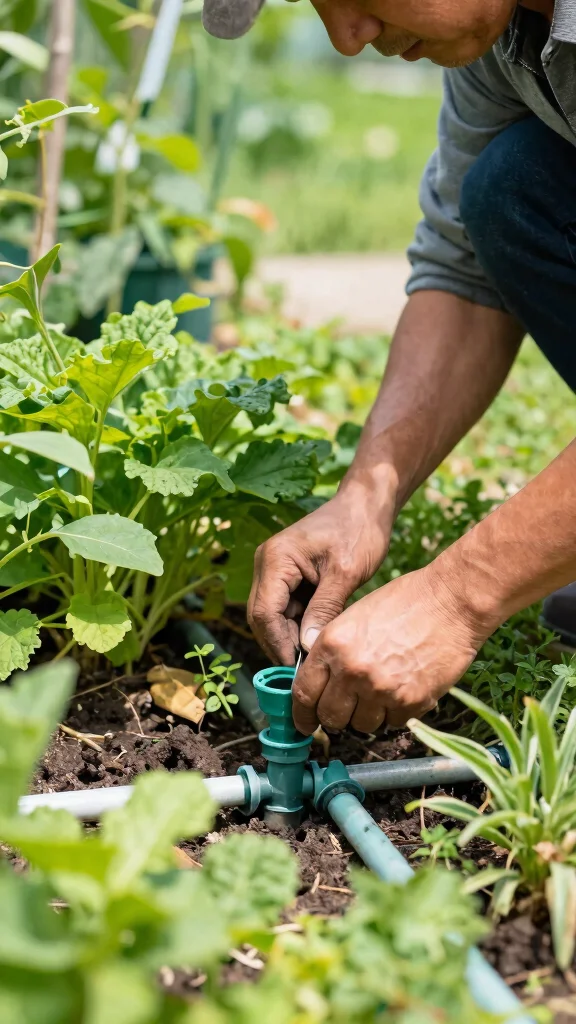
To keep your PVC sprinkler systems in top shape, regular maintenance is essential. Frequently check for clogs in the pipes or sprinkler heads and clean them when necessary. Additionally, inspect all connections for leaks and ensure that any filters are clean to maintain efficiency.
Investing a little time in maintenance can significantly extend the life of your irrigation system, ensuring efficient watering for years to come.
Key benefits of maintenance include:
– Prolongs the lifespan of your irrigation setup.
– Ensures effective watering for healthy plants.
Maintenance tips to consider:
– Clean pipes and heads on a regular basis.
– Winterize your system to prevent damage from freezing.
– Replace any damaged components promptly.
By dedicating some time to upkeep, your PVC sprinkler system will provide reliable service and keep your garden flourishing!
Conclusion
Embracing a DIY PVC pipe sprinkler system for your urban garden can transform your watering routine into a hassle-free task.
With creativity and a little effort, you can design a solution tailored to your specific gardening needs. From vertical systems to adjustable heads, these builds offer countless possibilities to nurture your plants while conserving water and making the most of your space.
Start your PVC pipe projects today and watch your garden flourish!
Note: We aim to provide accurate product links, but some may occasionally expire or become unavailable. If this happens, please search directly on Amazon for the product or a suitable alternative.
This post contains Amazon affiliate links, meaning we may earn a small commission if you purchase through our links, at no extra cost to you.
Frequently Asked Questions
What are PVC pipe sprinklers and how do vertical PVC pipe sprinkler systems work in urban gardens?
A pvc pipe sprinkler is a simple, low-cost watering device made from PVC pipes with perforated outlets that distribute water evenly. In vertical sprinkler systems, water travels up a column of PVC tubes and exits through drilled holes or sprinkler heads to cover plant beds.
These setups are popular in urban gardens because they save space, use affordable materials, and are easy to expand with additional PVC gardening projects. For best results, plan a compact layout, orient emitters outward, and dial in flow to avoid overwatering.
How much water pressure do these DIY PVC garden irrigation setups need and how can I ensure even coverage?
Most home faucets provide around 40–60 psi, which works well for many PVC sprinkler builds. Start with a pressure regulator if your supply is higher to protect fittings and maintain steady spray. To get even coverage, space perforations or emitters evenly along the main line, test with a bucket, and adjust flow using valves or different emitter sizes.
In a vertical setup, make sure the top is vented and the water flows smoothly through the column to prevent pooling.
What materials and tools do I need to build an affordable PVC gardening project sprinkler system?
Here’s a practical starter list for a DIY garden irrigation project:
– PVC pipes (1/2″ or 3/4″ diameter) and end caps
– Fittings: tees, elbows, couplers
– Sprinkler heads, perforated outlets, or micro-drip emitters
– Primer and cement, Teflon tape, sealant
– Tools: PVC cutter, hack saw, drill with a hole punch, marker, ruler
Finish with a few brackets or zip ties to secure the system as a PVC gardening projects in tight spaces.
How can I customize a PVC sprinkler system for a small balcony or rooftop garden?
Start with a compact footprint and a simple layout that fits your space. Use shorter vertical columns or a single main line with branching emitters to water raised planters and trellised greens. Consider a low-flow setup to save water and a drip-to-sprinkler hybrid for even coverage.
Think of it as a DIY garden irrigation project you can scale: add more PVC columns later, or swap in different sprinkler heads to tailor spray patterns for containers, shelves, or vertical gardens.
What maintenance tips help extend the life of a homemade sprinkler system in different weather conditions?
Keep your system clean and leak-free with quick checks every few weeks. Flush lines to clear sediment, inspect joints, and replace worn seals. In freezing climates, drain water from lines or store components indoors to prevent cracking; in hot sun, shield exposed tubing from UV and prune nearby vegetation to avoid blockages. Regularly winterize and test the system before the growing season to ensure reliable watering.
Related Topics
PVC pipe sprinkler
DIY garden irrigation
urban gardening
homemade sprinkler systems
affordable watering solutions
vertical gardening
easy DIY projects
beginner friendly
sustainable gardening
water conservation
garden maintenance
PVC gardening projects